Introduction
If you’re craving authentic Filipino comfort food but don’t have hours to spend in the kitchen, rice cooker sinangag is your answer. This beloved garlic fried rice dish—a staple at Filipino breakfast tables and family gatherings—becomes incredibly simple when you harness the power of your rice cooker. No wok required, no constant stirring, and no guesswork. Just perfectly fragrant, golden rice infused with aromatic garlic and your choice of protein, ready in under an hour.
Whether you’re a busy parent, a student living in a dorm, or simply someone who appreciates foolproof cooking methods, this recipe delivers restaurant-quality results with minimal effort. Let me show you how to transform humble ingredients into a dish that’ll have everyone asking for seconds.
What You’ll Need
Essential Ingredients for Sinangag
The beauty of sinangag lies in its simplicity. You don’t need a long ingredient list—just quality basics executed well.
For the Rice:
- 2 cups uncooked jasmine or long-grain white rice
- 2¾ cups water (or follow your rice cooker’s water line)
- 6-8 cloves fresh garlic, minced
- 3 tablespoons vegetable oil (or coconut oil for traditional flavor)
- 2 tablespoons soy sauce (optional, but recommended)
- ½ teaspoon salt
- ¼ teaspoon white pepper
- 3-4 green onions, chopped (for garnish)
For the Protein:
- 1 cup cooked protein of your choice (see options below)
Protein Options: Chicken Adobo, Longganisa, and Beyond
The protein you choose sets the tone for your entire dish. Here are the most authentic and delicious options:
Chicken Adobo (Most Popular)
- Tender, savory chicken braised in vinegar and soy sauce
- Adds depth and richness to the rice
- Can be prepared a day ahead
Longganisa (Filipino Sausage)
- Sweet and savory cured sausage
- Provides a distinct Filipino flavor profile
- Slice and pan-fry before adding to rice
Tocino (Cured Pork)
- Sweet-cured pork slices
- Adds a caramelized sweetness
- Slice thinly and cook until edges are crispy
Fried Chicken
- Shredded or diced leftover fried chicken
- Creates a more casual, comfort-food vibe
- Works great with store-bought rotisserie chicken
Spam or Corned Beef
- Quick and convenient options
- Dice and pan-fry until edges are crispy
- Popular in Filipino households for weeknight dinners
Smart Ingredient Swaps for Dietary Needs
For Gluten-Free:
- Replace soy sauce with tamari or coconut aminos
- Verify your protein choice is gluten-free
For Lower Sodium:
- Reduce soy sauce to 1 tablespoon or omit entirely
- Use salt to taste instead
For Vegetarian/Vegan:
- Substitute protein with crispy tofu, tempeh, or extra vegetables
- Add cashews or peanuts for crunch and protein
For Brown Rice Lovers:
- Use brown rice with adjusted water ratio (typically 1:2.5 rice to water)
- Increase cooking time by 10-15 minutes
Prep Work: Setting Yourself Up for Success
Good preparation is the secret to stress-free cooking. Spend 10 minutes getting organized, and the rest of the process becomes effortless.
How to Prepare Your Rice
Rinsing is Key:
- Measure 2 cups of uncooked rice into a fine-mesh strainer
- Rinse under cold running water, stirring gently with your fingers
- Continue rinsing until the water runs mostly clear (this removes excess starch)
- Let drain for 1-2 minutes
Why This Matters:
Rinsing removes the starchy coating that causes rice to clump together. This step is non-negotiable if you want fluffy, separated grains rather than a gummy mass.
Mincing Garlic the Right Way
The Best Method:
- Peel 6-8 cloves of fresh garlic
- Crush each clove slightly with the flat side of your knife (this makes mincing easier)
- Mince finely with a sharp knife—aim for pieces about the size of a grain of rice
- Alternatively, use a garlic press or microplane for ultra-fine garlic
Pro Tip:
Freshly minced garlic releases more aromatic oils than pre-minced garlic from a jar. The difference in flavor is noticeable and worth the extra 2 minutes of prep work.
Cooking Your Protein in Advance
Why Cook Ahead:
- Proteins like chicken adobo taste better when flavors have time to develop
- You can prepare protein the night before, making morning cooking faster
- Cooked protein is easier to incorporate evenly into the rice
Quick Protein Prep:
- Chicken Adobo: Cook according to your favorite recipe (or use store-bought)
- Longganisa: Pan-fry slices in a skillet until edges are caramelized, then chop
- Tocino: Cook in a skillet until edges are crispy, then dice
- Rotisserie Chicken: Shred or dice and set aside
Step-by-Step Cooking Instructions
Sautéing Garlic in Your Rice Cooker
If Your Rice Cooker Has a Sauté Function:
- Plug in your rice cooker and select the sauté or warm setting
- Add 3 tablespoons of oil and let it heat for 1-2 minutes
- Add minced garlic and stir constantly for 2-3 minutes until fragrant and light golden
- Be careful not to burn the garlic—it should smell amazing, not acrid
If Your Rice Cooker Doesn’t Have a Sauté Function:
- Heat oil in a small skillet over medium heat
- Add minced garlic and cook for 2-3 minutes until fragrant
- Set aside (you’ll add this to the rice cooker in the next step)
The Garlic Moment:
This is where the magic happens. The aroma of garlic infusing into hot oil is the signature scent of sinangag. Don’t rush this step—it’s worth savoring.
Cooking the Rice to Perfection
- Add rinsed rice to the rice cooker (or back to the rice cooker if you sautéed garlic separately)
- Pour in 2¾ cups of water (or follow your rice cooker’s water line)
- Add soy sauce, salt, and white pepper
- If you sautéed garlic in a skillet, pour the garlic and oil into the rice cooker now
- Stir well to combine all ingredients
- Close the lid and select the “Cook” or “White Rice” setting
- Allow to cook until the rice cooker switches to “Warm” (typically 25-30 minutes)
- Let the rice rest on the “Warm” setting for 5-10 minutes
Why the Rest Period Matters:
This allows the rice to finish absorbing any remaining moisture and makes it easier to fluff without breaking the grains.
Combining and Mixing for Even Flavor Distribution
- Open the rice cooker lid carefully (watch out for steam)
- Add your cooked protein (1 cup, chopped or shredded)
- Using a rice paddle or fork, gently fluff the rice and mix in the protein
- Use a folding motion rather than aggressive stirring to avoid breaking the grains
- Mix for about 1-2 minutes until the protein is evenly distributed
- Taste and adjust seasoning if needed (add more salt, pepper, or soy sauce to taste)
The Mixing Technique:
Think of it like folding egg whites into a soufflé—gentle and deliberate. You want to incorporate the protein without crushing the rice grains.
Serving and Presentation
Garnishing Your Sinangag
Essential Garnish:
- Fresh chopped green onions (white and light green parts)
- Sprinkle generously over the top just before serving
Optional Garnishes for Extra Flair:
- Crispy Fried Garlic: Toast extra minced garlic in oil until golden and crispy, then drain on paper towels
- Fried Shallots: Adds a sweet, oniony crunch
- Sesame Seeds: A light sprinkle adds nuttiness
- Fresh Cilantro: For a fresh, herbaceous note
- Crispy Bacon Bits: For added smokiness and texture
Complementary Side Dishes
Sinangag is traditionally served as part of a larger breakfast spread. Here are the perfect companions:
The Classic Breakfast Combo:
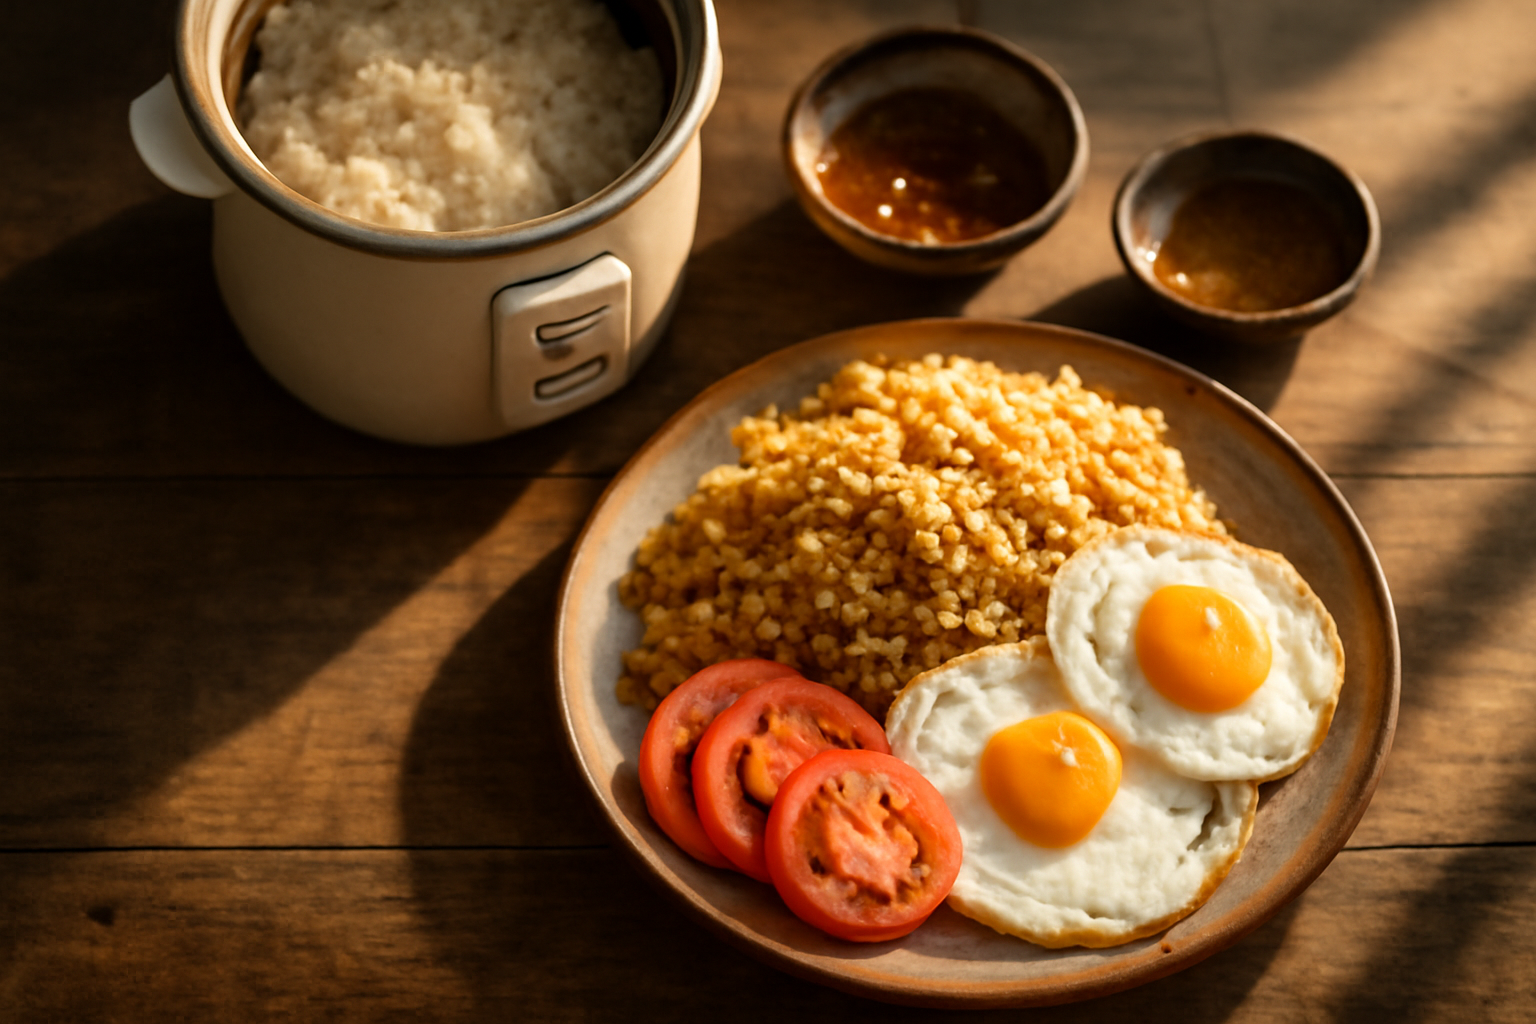
- Fried Egg: Sunny-side up or over-easy, with a runny yolk that mingles with the rice
- Fried Tomato Slices: Slightly caramelized and seasoned with salt and pepper
- Pickled Vegetables: Achara (pickled papaya) or pickled radish for brightness
Light Lunch Pairings:
- Fresh Green Salad: Dressed with vinegar and oil to cut through the richness
- Grilled Vegetables: Zucchini, eggplant, or bell peppers
- Cucumber Salad: Cool and refreshing
Protein Additions:
- Grilled Fish: Bangus (milkfish) or tilapia
- Lumpia: Spring rolls for textural contrast
- Fried Shrimp: For a seafood twist
Dipping Sauces That Elevate the Dish
Spiced Vinegar (Suka with Chili):
- Mix equal parts white vinegar and soy sauce
- Add minced fresh chili peppers or chili flakes
- Add minced garlic and a pinch of sugar
- Let sit for 10 minutes before serving
Garlic Vinegar:
- Simmer white vinegar with sliced garlic for 5 minutes
- Cool and serve in small bowls
- Perfect for dipping each spoonful
Soy-Lime Dipping Sauce:
- 3 tablespoons soy sauce
- 2 tablespoons fresh lime juice
- 1 minced garlic clove
- ½ teaspoon sugar
- Pinch of chili flakes
Storage and Reheating
Refrigerating Leftovers Properly
Best Practices:
- Let sinangag cool to room temperature (about 15-20 minutes)
- Transfer to an airtight container
- Store in the refrigerator for up to 3 days
- Label with the date for easy tracking
Why Airtight Containers Matter:
Rice absorbs odors from the refrigerator. An airtight container keeps your sinangag tasting fresh and prevents it from picking up unwanted flavors.
Freezing for Long-Term Storage
Freezing Method:
- Cool sinangag completely
- Divide into individual portions using freezer bags or airtight containers
- Remove as much air as possible (use the water displacement method for bags)
- Label with the date and contents
- Freeze for up to 1 month
Portion Tip:
Freeze in individual portions so you can thaw and reheat exactly what you need without waste.
Best Practices for Reheating
Stovetop Method (Best Results):
- Heat 1 tablespoon of oil in a skillet over medium-high heat
- Add the sinangag and break up any clumps
- Stir-fry for 3-5 minutes until heated through and slightly crispy
- Add a splash of soy sauce or water if it seems dry
- Serve immediately
Microwave Method (Quick):
- Place sinangag in a microwave-safe bowl
- Add 1-2 tablespoons of water to prevent drying
- Cover loosely with a paper towel
- Microwave on high for 1-2 minutes, stirring halfway through
- Check temperature and reheat in 30-second intervals if needed
Rice Cooker Method (Convenient):
- Add sinangag to your rice cooker
- Add 2-3 tablespoons of water
- Select the “Warm” setting and cover
- Heat for 10-15 minutes until warmed through
Pro Tip:
The stovetop method gives you the crispiest, most delicious results because it allows the rice to develop a slight crust. It’s worth the extra 5 minutes.
Nutritional Benefits
Macronutrient Breakdown
Per Serving (approximately 1.5 cups with protein):
- Calories: 380-420 (depending on protein choice)
- Carbohydrates: 52-55g (primarily from rice)
- Protein: 12-15g (from protein addition)
- Fat: 12-14g (from oil and protein)
- Fiber: 0.5-1g
Macronutrient Notes:
- Rice provides complex carbohydrates for sustained energy
- Protein addition makes this a complete meal
- Healthy fats from oil support nutrient absorption
Health Benefits of Key Ingredients
Garlic:
- Contains allicin, a compound with anti-inflammatory properties
- May help support immune function
- Provides antioxidants that protect cells from damage
- May help regulate blood pressure and cholesterol
Rice (White):
- Quick source of energy from carbohydrates
- Easily digestible
- Naturally gluten-free
- Provides B vitamins for energy metabolism
Rice (Brown Alternative):
- Higher in fiber for digestive health
- Contains more minerals like magnesium and phosphorus
- Lower glycemic index than white rice
- More sustained energy release
Soy Sauce:
- Provides umami flavor with minimal calories
- Contains amino acids
- Offers probiotics if using naturally fermented varieties
Adjusting the Recipe for Your Dietary Goals
For Weight Management:
- Use brown rice instead of white rice
- Reduce oil to 2 tablespoons
- Increase vegetable content
- Choose lean proteins like chicken breast
- Aim for 1-1.5 cups per serving rather than 2 cups
For High Protein Needs:
- Add an extra ½ cup of protein
- Include an egg on the side
- Choose protein-rich options like chicken or tofu
- Add nuts or seeds as garnish
For Low Sodium:
- Omit soy sauce entirely or use low-sodium version
- Use salt sparingly
- Choose unsalted proteins
- Serve with fresh vegetables instead of salty sides
For Diabetics:
- Substitute brown rice or cauliflower rice
- Reduce portion size to 1 cup
- Pair with protein and vegetables to slow carbohydrate absorption
- Monitor total carbohydrate intake
Pro Tips for Perfect Rice Cooker Sinangag
Preventing Sticky Rice
The Root Cause:
Sticky rice results from excess starch coating the grains. Here’s how to prevent it:
- Rinse Thoroughly: This is non-negotiable. Rinse until water runs clear.
- Use the Right Water Ratio: Follow your rice cooker’s water line, not guesswork. Different cookers vary.
- Don’t Overfill: Fill the cooker no more than two-thirds full.
- Avoid Lifting the Lid: Every time you peek, you release steam and affect cooking.
- Use the Rest Period: Let rice sit on warm for 5-10 minutes after cooking finishes.
- Fluff Gently: Use a fork or rice paddle to separate grains without crushing them.
The Texture You’re After:
Each grain should be separate and slightly firm, not mushy or clumped together.
Maximizing Garlic Flavor
Technique Matters:
- Fresh Garlic Only: Pre-minced garlic loses volatile oils. Fresh is always better.
- Mince Finely: Smaller pieces release more flavor and distribute better.
- Don’t Burn It: Light golden is perfect; dark brown tastes bitter.
- Use Enough: 6-8 cloves for 2 cups of rice is the sweet spot. Don’t be shy.
Flavor Layering:
- Sauté garlic in oil first (releases aromatic compounds)
- Cook with rice (infuses throughout)
- Garnish with fresh green onions (adds brightness)
Extra Garlic Hack:
Reserve a small amount of minced garlic and add it to the oil just before serving. This fresh garlic provides a bright, peppery note that contrasts beautifully with the cooked garlic.
Adding Vegetables Without Compromising Texture
The Challenge:
Vegetables release moisture, which can make rice soggy. Here’s how to avoid it:
Best Vegetables to Add:
- Peas: Frozen peas added in the last 5 minutes of cooking
- Corn: Frozen corn kernels, added at the same time as peas
- Carrots: Finely diced and added during the sauté phase (they cook with the garlic)
- Bell Peppers: Finely diced, added during sauté phase
- Green Beans: Finely chopped, added during sauté phase
Vegetables to Avoid:
- Tomatoes (too watery)
- Zucchini (releases too much moisture)
- Mushrooms (absorb too much water)
- Leafy greens (wilt and become mushy)
The Method:
- Sauté harder vegetables (carrots, peppers) with the garlic
- Add frozen vegetables in the last 5 minutes of cooking
- Don’t add fresh, wet vegetables directly to the rice cooker
- If using fresh vegetables, cook them separately and fold in after
Frequently Asked Questions
Q: Can I use brown rice instead of white rice?
A: Absolutely! Brown rice is a nutritious alternative. You’ll need to adjust the water ratio to approximately 1:2.5 (1 cup rice to 2.5 cups water) and increase cooking time by 10-15 minutes. Brown rice has a nuttier flavor that pairs beautifully with garlic. Some people prefer it for the added fiber and nutrients.
Q: Is this dish gluten-free?
A: Yes, it can be! The rice itself is naturally gluten-free. The only potential gluten source is soy sauce. Simply substitute with tamari or coconut aminos (both gluten-free alternatives) and verify that your protein choice is gluten-free. Most proteins like chicken, pork, and tofu are naturally gluten-free, but processed options like Spam may contain gluten, so check labels.
Q: Can I make this dish vegetarian?
A: Definitely! Replace the meat with one of these options:
- Crispy Tofu: Press and pan-fry until golden, then dice
- Tempeh: Crumbled and pan-fried until crispy
- Mushrooms: Finely diced and sautéed until golden (cremini or shiitake work best)
- Cashews: Roasted and chopped for crunch and protein
- Extra Vegetables: Peas, corn, carrots, and bell peppers
The dish will be lighter but still delicious and satisfying.
Q: How do I prevent the rice from sticking?
A: The key is rinsing the rice thoroughly before cooking to remove excess starch. Rinse under cold water, stirring gently, until the water runs mostly clear. Additionally, follow your rice cooker’s water line precisely, avoid opening the lid during cooking, and let the rice rest on the warm setting for 5-10 minutes after cooking finishes. Finally, use a gentle fluffing motion with a fork or rice paddle rather than stirring aggressively.
Q: Can I add vegetables to this dish?
A: Yes! Add vegetables strategically to avoid making the rice soggy. Sauté harder vegetables like carrots, bell peppers, and green beans with the garlic. Add frozen peas and corn in the last 5 minutes of cooking. Avoid watery vegetables like tomatoes and zucchini, which release too much moisture. Leafy greens should be added after cooking and folded in gently.
Q: What’s the best way to reheat leftover sinangag?
A: The stovetop method gives the best results. Heat 1 tablespoon of oil in a skillet over medium-high heat, add the sinangag, and stir-fry for 3-5 minutes until heated through and slightly crispy. Add a splash of soy sauce or water if it seems dry. If you’re in a hurry, the microwave works (1-2 minutes on high with a splash of water), but the stovetop method creates a better texture with slightly crispy edges.
Q: Can I prepare this dish without a rice cooker?
A: Yes, though a rice cooker makes it easier. To cook rice on the stovetop:
- Rinse rice and add to a pot with 2¾ cups water
- Bring to a boil over high heat
- Reduce heat to low, cover, and simmer for 18-20 minutes
- Remove from heat and let rest, covered, for 5 minutes
- Sauté garlic in oil separately, then fold into cooked rice with protein
The rice cooker method is more forgiving because it automatically adjusts heat and prevents burning.
Q: How far in advance can I cook the protein?
A: Most proteins can be cooked 1-2 days ahead and stored in the refrigerator. Chicken adobo actually tastes better after a day as flavors develop. Store cooked protein in an airtight container. When ready to use, you can serve it cold or reheat it gently in a skillet. This advance prep makes weeknight sinangag incredibly quick—just cook the rice and combine.
Final Thoughts
Rice cooker sinangag proves that authentic, delicious Filipino food doesn’t require complicated techniques or hours in the kitchen. With a rice cooker, quality ingredients, and 10 minutes of prep work, you can create a dish that tastes like it came from a Filipino grandmother’s kitchen.
The beauty of this recipe lies in its flexibility. Whether you’re feeding a family, meal-prepping for the week, or satisfying a late-night craving, sinangag adapts to your needs. Experiment with different proteins, add your favorite vegetables, and make it your own.
Start with the basic recipe, master the technique, and then have fun with variations. Your rice cooker is about to become your secret weapon for impressive, effortless Filipino cooking.
Happy cooking, and enjoy every fragrant, garlicky bite!